

+086-15305925923
K-WANG
Service expert in industrial control field!


Product
Article
NameDescriptionContent
Adequate Inventory, Timely Service
pursuit of excellence


Ship control system
Equipment control system
Power monitoring system
Current position:
新闻动态
newS
Brand
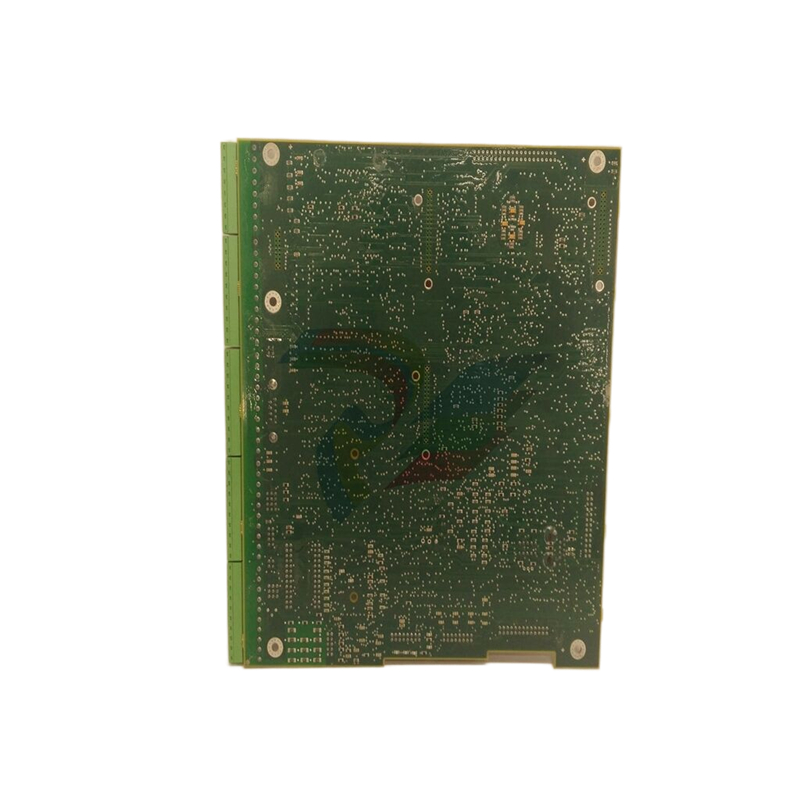
ABB DSCA114 57510001-AA MasterPiece - Communication Module
ABB DSCA114 57510001-AA MasterPiece - Communication Module
ABB DSCA114 57510001-AA MasterPiece - Communication Module
If terminals A/B of RLM 01 are positioned at the beginning or end of a bus segment,
two terminals must be provided with one bus termination each (resistor
combination). The same also applies for terminal M if it is located at the beginning
or the end of a PROFIBUS segment. It is preferable to use PROFIBUS terminals
with an integrated resistor combination that can be turned on and off. A short circuit-proof power supply to supply the resistors located in the connector is
available on pins 5 (VP+) and 6 (DGND). The designation A/B in the following
figure refers to the cables in the PROFIBUS cable and not to the redundant
PROFIBUS cables, which are also named A/B.
The power supply and alarm lines are connected directly to the terminals labelled 1
to 8. If it is necessary to replace the module, you need only remove the terminal
strips. The maximum of 8 cables remain connected. The functions of terminals 1... 8
are given in the following table.
You can press down the orange-coloured pin using a narrow screwdriver to open the
cage tension spring. Only press the pin in far enough to feel a noticiable resistance
( about 1 mm below the upper surface of the terminal strip ). Now insert the
stripped wire as far as it will go into the large hole on the left. Reliable contact is
only ensured if the cage tension spring grasps the wire and not the insulation around
it. The cage tension spring can receive solid wires or rough wire strands with cross
sections from 0.14 to 1.5 mm2. Please use flexible or rough wire strands with the
lowest possible cross section for better handling and reduced mechanical stress to
the terminal strip.
Terminal: Short description: Meaning:
8 F1 Potential-free alarm contact (closed in fault-free
operation) 7 F2
6 L2+ Redundant power supply and associated ground
connection 5 M
4 L1+ Cable jumper from L1+ to L2+ if no red. voltage is
present
3 L1+ +24 V power supply and associated ground con nection 2 M
1 E Connection for PE conductor
Configuration of the RLM 01 merely involves setting the baud rate. It should be set
with the rotary switch on the front panel before turning on the power supply. You
can select baud rates of from 9.6 kbd to 12 Mbd. If the baud rate is changed during
ongoing operation, you should push the reset button once briefly to reset the control
logic and the counters etc. to a defined initial state.
Example: The switch shown is at setting 3, corresponding to a baud rate of 1.5 Mbd
Switch setting: Baud rate: Unit:
0 12 Mbd or MBit/s
1 6
2 3
3 1.5
4 500 kbd or kBit/s
5 187.5
6 93.75
7 19.2
8 9.6
9 -/- No function
RLM01 is certified for applications on ships and maritime systems by the Germanic
Lloyd (GL). To meet the increased requirements regarding EMC and overvoltage,
RLM01 must have one or two "24 VDC power supply filters (surge)" depending on
the supply (single / redundant). The supply of several RLM01 behind one filter is
not admissible. The max. length of the lines between filter and RLM01 must not
exceed 1 m. Possibly needed fuse elements have to be arranged before the filter. The
electrical connection to ground potential is effected via the module attachment as
with RLM01. The following example shows the interconnection in case of a
redundant supply of RLM01. For a single supply of RLM01, the L2+ terminal has to
be bridged with the second L1+ terminal.
- YOKOGAWA
- Reliance
- ADVANCED
- SEW
- ProSoft
- WATLOW
- Kongsberg
- FANUC
- VSD
- DCS
- PLC
- man-machine
- Covid-19
- Energy and Gender
- Energy Access
- Renewable Integration
- Energy Subsidies
- Energy and Water
- Net zero emission
- Energy Security
- Critical Minerals
- A-B
- petroleum
- Mine scale
- Sewage treatment
- cement
- architecture
- Industrial information
- New energy
- Automobile market
- electricity
- Construction site
- HIMA
- ABB
- Rockwell
- Schneider Modicon
- Siemens
- xYCOM
- Yaskawa
- Woodward
- BOSCH Rexroth
- MOOG
- General Electric
- American NI
- Rolls-Royce
- CTI
- Honeywell
- EMERSON
- MAN
- GE
- TRICONEX
- Control Wave
- ALSTOM
- AMAT
- STUDER
- KONGSBERG
- MOTOROLA
- DANAHER MOTION
- Bentley
- Galil
- EATON
- MOLEX
- Triconex
- DEIF
- B&W
- ZYGO
- Aerotech
- DANFOSS
- KOLLMORGEN
- Beijer
- Endress+Hauser
- schneider
- Foxboro
- KB
- REXROTH
- YAMAHA
- Johnson
- Westinghouse
- WAGO
- TOSHIBA
- TEKTRONIX
- BENDER
- BMCM
- SMC
- HITACHI
- HIRSCHMANN
- XP POWER
- Baldor
- Meggitt
- SHINKAWA
- Other Brands
- other brands
- UniOP
- KUKA
- IBA
51
-
ABB 5SHX1445H0002 Power Semiconductor Module
-
ABB CI853-1 Communication Interface Module
-
ABB CI858-1 Communication Interface Module
-
ABB PM861K01 Processor Unit
-
ABB REM610 Motor Protection Relay
-
ABB 5SDF1045H0002 Power Semiconductor Module
-
Lilaas R01TS10A0H03-00 Marine Control Lever Module
-
Metso 1H13767C-3 - Paper Pinion Hand Guide Bevel
-
Metso LK-2101 - Linkage Kit
-
Metso A413510 - Rack Enclosure 21 Slots
-
Metso ND9106HU-K - Intelligent Valve Controller
-
Metso D201190L - AO4H Analog Module
-
Metso WIN1011187 - Top Slitter Assembly
-
Metso 251920 - Automation Component
-
Metso LK-1871 - Linkage Kit
-
Metso SE200N529 - XP Power Supply 115/230 VAC
-
Metso Shadow Brown Fleece - Harkila Half Zip Sweater
-
Metso DI8P - Valmet Digital Input Module
-
Metso DO8S0 - Valmet Digital Output Module
-
Metso AO8C - Valmet Analog Output Module
-
Metso AO4H - Valmet Analog Output Module
-
Metso AI8C - Valmet Analog Input Module
-
Metso PDCF2529 - Shaft Sleeve
-
Metso ST2.8 - Lokotrack Owners Manual & Parts Book
-
Metso 500836-M1 - Impeller Pump Release Collar Assembly
-
Metso RKN 33 XT - Valve Service Kit Pack
-
Metso PDCH2539 - Shaft Sleeve
-
Metso LK-2017 - Actuator Linkage
-
Metso N88409030 - Hammer Screw Jaw Crusher M48X970
-
Metso 181538 - IOP365 Isolated Analog Input Module
-
Metso 10691-04 - Charging Kit Olear/Parker
-
Metso QX4SB02SDM - Automation Component
-
Metso VAL0062567 - Pneumatic Cylinder 250 Psi
-
Harkila Metso Full Zip - Fleece Jacket Willow Green
-
Metso AM1-389 829-0010-218 - Bracket for 3+4 in Ball Valve
-
Metso D200467 - IO Rack
-
Metso RKN-359XT - Repair Kit
-
Metso 2.00SB2HKT27A6 - Parker Pneumatic Cylinder
-
Metso D100306 - AIF2mV GEB Module
-
Metso A413757 - AOR4C GEB Module
-
Metso A413754 - AIR8H GEB Module
-
Metso A413767 - AOF2V GEB Module
-
Metso A413742 - BIR82 GEB Module
-
Metso A413744 - BOR82 GEB Module
-
Metso A413753 - AIR8V GEB Module
-
Metso A413752 - AIR8C GEB Module
-
Metso 96511900 - Hydraulic Filter
-
Metso IOP334 - Isolated Digital Input Module
-
Metso 1003894081 - High Flow Oil Filter Cartridge
-
Metso H035506 - Ball Valve Seat Set Kit
-
Metso PDCH2680 - Shaft Sleeve
-
Metso LK-937 - Linkage Kit
-
Metso VAL0353763 - Valmet Pneumatic Cylinder 250PSI
-
Metso APL3037188 - Hydraulic Cylinder 2" Bore
-
Metso 181540 - IOP307 Isolated Analog Input Module
-
Metso LK-2032 - Linkage Kit
-
Metso VAL0207205 - Valmet Automation Power Supply
-
Metso PDCF2680 - Shaft Sleeve
-
Metso 422244-1A - GMB Relay Module Board
-
Metso VAL0356906 - Paper Pneumatic Cylinder
-
Metso RKW-355TT - Jamesbury Repair Kit 8in
-
Metso QN2SP02SXM-BSF - Quartz Valve Control Stonel
-
Metso D201134 - AI8 Analog Input Module
-
Metso APL3032501 - Automation Component
-
Metso D201784L - MBM Backplane
-
Metso M851121 - DMU M2 Module
-
Metso A413310 - Valmet Neles VPU Power Unit
-
Sarianna Metso The Serekh Texts - Hardcover Book
-
Metso 5044i9PS - Pump Impeller
-
Metso 181575 - IOP345 Overspeed Trip Module
-
Metso RKQ-66 - Jamesbury Actuator Diaphragm
-
Metso RKW353XZ - Automation Component
-
Metso PIC-09-50-200 - Automation Component
-
Metso LK-2027 - Linkage Kit
-
Metso XZB10025-011T12 - Moog Valve 9650962700
-
Metso XZB10025-010T12 - Moog Valve 9650965300
-
Metso-SP Transmitter Cable - Operating Unit with 10m Cable
-
Harkila Metso Hybrid - Hunting Jacket Willow Green
-
Metso ND8221/S1 - Neles Valve Positioner
-
Metso METSO10119 - ScreenCheck Component
-
Metso LK-2025 - Linkage Kit
-
Metso A416733 - IQweight External Air Gap Temperature Sensor
-
Metso RKC22MT - Automation Component
-
Metso A413281 - Automation Board
-
Metso LCP9HLY - Stainless Steel Enclosure
-
Metso NP704S/B1S1 - Pneumatic Positioner with I/P Converter
-
Metso BAH3 - Slurry Seal Type
-
Metso A413531-03 - PLC Module Chassis Rack
-
Metso P4610004 - MCAI Communicator Controller
-
Metso QN2AN03HDM - Quartz Valve Positioner Stonel
-
Metso RKW-352-XZ - Automation Component
-
Metso A4300081 - Kajaani LCD Display
-
Metso A428026 7B - Kajaani Rectifier Unit 1
-
Metso 202218 - Kajaani Sensor Power Supply SR 902660
-
Metso 9150 316SS CSTL - Jamesbury 150-2" BN50 Valve
-
Metso 81806 - IOP101 Module
-
Metso STOM000272 - Paper Bushing CR38
-
Metso 1975413 - Chain Hoist Links
-
Metso IMO G053-191597 - Minor Seal Kit
-
Metso VAL0087418 - Cylinder Valmet NTS6LV
-
Metso A413061 - DMU Board VPA 420355-4B
-
Metso P2620-80/25-100 - Automation Component
-
Metso VAL0035292 - Automation Component
-
Metso A413721 - Automation Component
-
Metso ST600 - Automation Component
-
Metso P4500001 - Automation Component
-
Metso SDBX/RA2 - CAT x KVM Extender
-
Metso D201126-DI8 - Digital Input Module
-
Metso D201189L - AI8H Analog Module
-
Metso NA004418 LK1016 - Wafersphere Actuator Mounting Bracket
-
Metso RKN172MTT - Repair Kit
-
Metso MM0311584 - Air Filter Kit RadialSeal
-
Metso 181517 - IOP301 Isolated Analog Input Module
-
Metso RAU3906506 - Automation Component
-
Metso 181208 - IOP332 Digital Input Module
-
Metso A413760 - AIF2C PCB Module
-
Metso 006 1089 36 - Shaft Bearing Seal
-
Metso A413046 - Automation Component
-
Metso VKJ650 - Automation Brake Component
-
Metso LK-1875 - Linkage Kit
-
Metso D201193L - FI4S24 Frequency Input Module
-
Metso D200533 - BIU82 Binary Input Module
-
Metso 500838-M1 - Impeller Pump Release Collar Assembly
-
Metso 2.00SB2ALUS19A - Pneumatic Cylinder 1.375 Stroke
-
Metso D201351 - RES Reserve Module
-
Metso A416100 - IQMoisture Spare Part Kit Halogen Lamp
-
Metso Slurry Pump - Back Liner
-
Metso 7088010042 - Bronze Lantern Ring

KONG JIANG

Add: Jimei North Road, Jimei District, Xiamen, Fujian, China
Tell:+86-15305925923