

K-WANG
+086-15305925923
Service expert in industrial control field!


Product
Article
NameDescriptionContent
Adequate Inventory, Timely Service
pursuit of excellence


Ship control system
Equipment control system
Power monitoring system
Brand
Product parameters
- Telephone:+86-15305925923
- contacts:Mr.Wang
- Email:wang@kongjiangauto.com
Description
The Relay Output Module provides eight individually isolated, electromechanical relay outputs. Four of
the outputs are Form-C, and the other four are Form-A. A schematic showing the relationship of individual
Form-A relays and Form-C relays to external (user) connections is given in Figure 65. SIL applications
require an external series relay used to ensure outputs achieve failsafe action. See HC900 Process & Safety Controller Safety Manual for additional details.
Honeywell Analog Input (8 channel) 900TEK-0001 900TBK-0001
Relay Output Module Wiring
The Relay Output Module provides eight individually isolated, electromechanical relay outputs. Four of
the outputs are Form-C, and the other four are Form-A. A schematic showing the relationship of individual
Form-A relays and Form-C relays to external (user) connections is given in Figure 65. SIL applications
require an external series relay used to ensure outputs achieve failsafe action. See HC900 Process & Safety
Controller Safety Manual for additional details.
Examples of Relay Output wiring as they relate to connections on the Terminal Block are shown in Figure66.
Figure 65 – Schematic Example: Relay Output and External Wiring
Contact Rating
Maximum current/output: 4A at 250Vac/30Vdc with resistive load
Maximum current per module: No de-rating per module, but ensure compliance with maximum ratings
for each output.
Note: specified relay life is 1,000,000 cycles. For applications requiring constant cycling of output,
Honeywell recommends using a solid state AC or DC output module.
Required Output Fusing
Outputs are not fused in the Relay module. Install a fuse for each output at the field device that is
appropriate for the load and the wire used.
Jumper Comb
A ten-position jumper comb, available for the AC Output Module, can be cut in half and used as shown in
Figure 67 to reduce the number of wires required to connect the Relay Output Module to AC Neutral or to
DC Common.
Hazardous voltages exist at terminal blocks.
Using switches at field devices disconnect the field wiring from power sources before servicing.
Failure to comply with these instructions could result in death or serious injury.
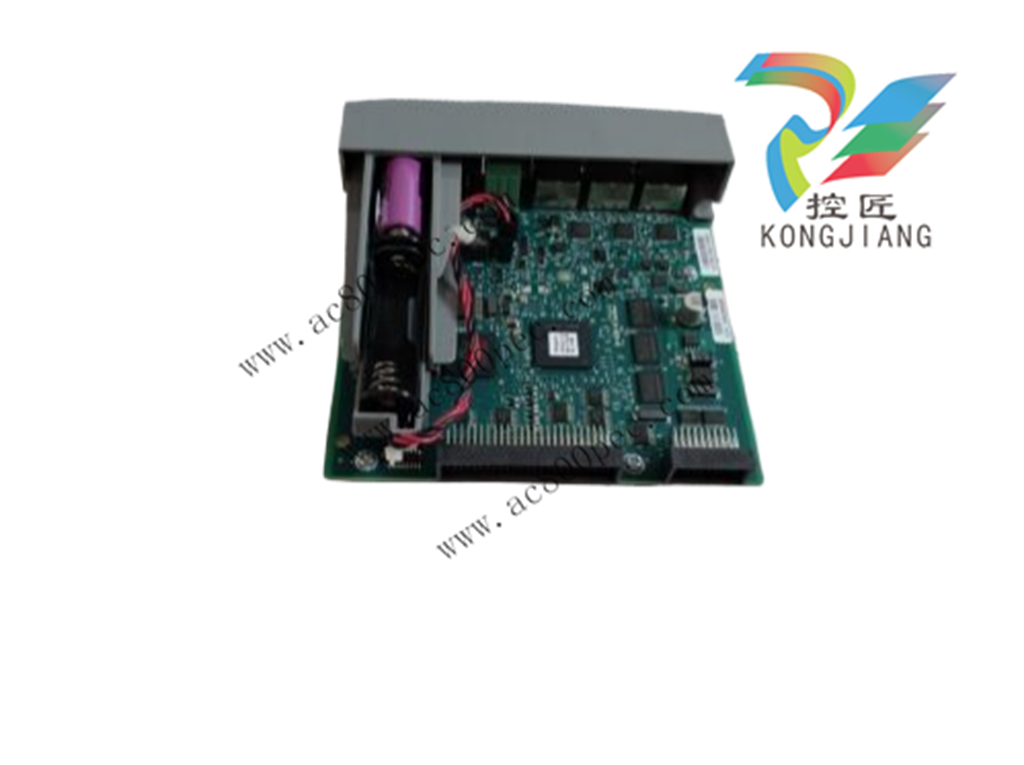
Figure 67 – Relay Output Module Jumpers
Pulse/Frequency/Quadrature Module Wiring (Figure 68 through Figure 74)
The 4 Channel Pulse/Frequency/Quadrature Module provides four different functionalities in the form of
Pulse Input, Frequency measurement, Quadrature encoder input and Pulse Output. Each of the 4 channels
can be configured for any one of these four functionalities; with the exception that quadrature encoder input
(A and B pulses) can be applied to only Channels 1 and 2 respectively. When configured for quadrature,
Channels 3 and 4 will still be available for use.
The Pulse Output functionality uses the digital output available on the module for outputting pulses.
Before installing be sure to set the module DIP switches for differential or single ended. See page 88.
Communications Installation
Overview
This section contains descriptions, procedures and recommendations for installing communications systems
and components.
Wiring and cabling
Table 16 – Connect Communications Wiring and Cabling
Step Procedure Comments/Reference
1 Determine requirements
for communications links.
See:
Ethernet
Devices/Considerations
on page 33
For legacy system,
serial Ports (RS-232
and RS-485) on page
42. For new system,
two RS-485 serial ports
on page 42
Cabling/Wiring Distance
Planning on page 54.
2 Refer to the diagram at
right, and to Table 17
Links to Controller
Communication Ports for
connection details.
All ports are shown.
(Availability depends on
controller model, see
Figure 12 page 29.)
Connect communications
cabling.
For Modbus connections,
see page 152.
Step Procedure Comments/Reference
Set IP addresses and
subnet masks.
Default IP addresses:
C30/C50: 192.168.1.254 and Subnet Mask of 255.255.255.0.
C70/C75: E1: 192.168.1.254, E2: 192.168.2.254. Must be on
different subnets.
Links to controller communication ports
Refer to Table 17 and the figure in Step 2 above. Port availability depends on Controller model.
Table 17 – Links to Controller Communication Ports
Controller
Port
/Connector Type
Link Type:
Controller to
Cable Type To Device/Port Details
Legacy controller
only RS-232
3-plug connector
Desktop or Laptop
PC
RS-232 Null Modem
cable, up to 50’
Or
RS-232 PC modem
cable, up to 50’
Serial port of PC (w/ Null
Modem cable)
or
Modem. Refer to RS-
232 Remote Connection
to PC Configuration Tool
on page 135.
For Wiring details of
Null Modem cable see
Table 19.
Legacy controller
only RS-232
3-plug connector
Modbus master
(controller is single
slave)
RS-232 Null Modem
cable, up to 50’
Or
RS-232 PC modem
cable, up to 50’
RS-232 to RS-485
converter
Refer to device’s port
instructions
Legacy controller
only RS-232
3-plug connector
Modbus master
(controller is one of
multiple slaves)
RS-232 to RS-485
converter
Refer to device’s port
instructions
Legacy controller
only RS-232
3-plug connector
Modbus slave
network (controller
is master)
RS-232 to RS-485
converter
Refer to device’s port
instructions
RS-485
3-Plug connector
Operator interface Belden #9271 (or
equivalent)
Terminal connector of
operator interface. (Refer
to Table 18.)
Connect from each CPU
(A and B) to the OI.
SIL applications require
shield drain wire to be
connected to grounding
bar.
RS-485
3-Plug connector
Modbus master
(controller is slave)
Belden #9271 (or
equivalent)
Refer to device’s port
instructions
SIL applications require
shield drain wire to be
connected to grounding
bar.
RS-485
3-Plug connector
Modbus slave
network (controller
is master)
Belden #9271 (or
equivalent)
Refer to device’s port
instructions
SIL applications require
shield drain wire to be
connected to grounding
bar.
Purchase history
| User name | Member Level | Quantity | Specification | Purchase Date |
|---|
Total 0 Record
Related products
Customer Reviews
Satisfaction :
5 Stars
No evaluation information


- other
- Other Brands
- AMAT
- Iba
- PEPPERL+FUCHS
- Aerotech
- WATLOW
- MAN
- ADVANCED
- Abaco
- YOKOGAWA
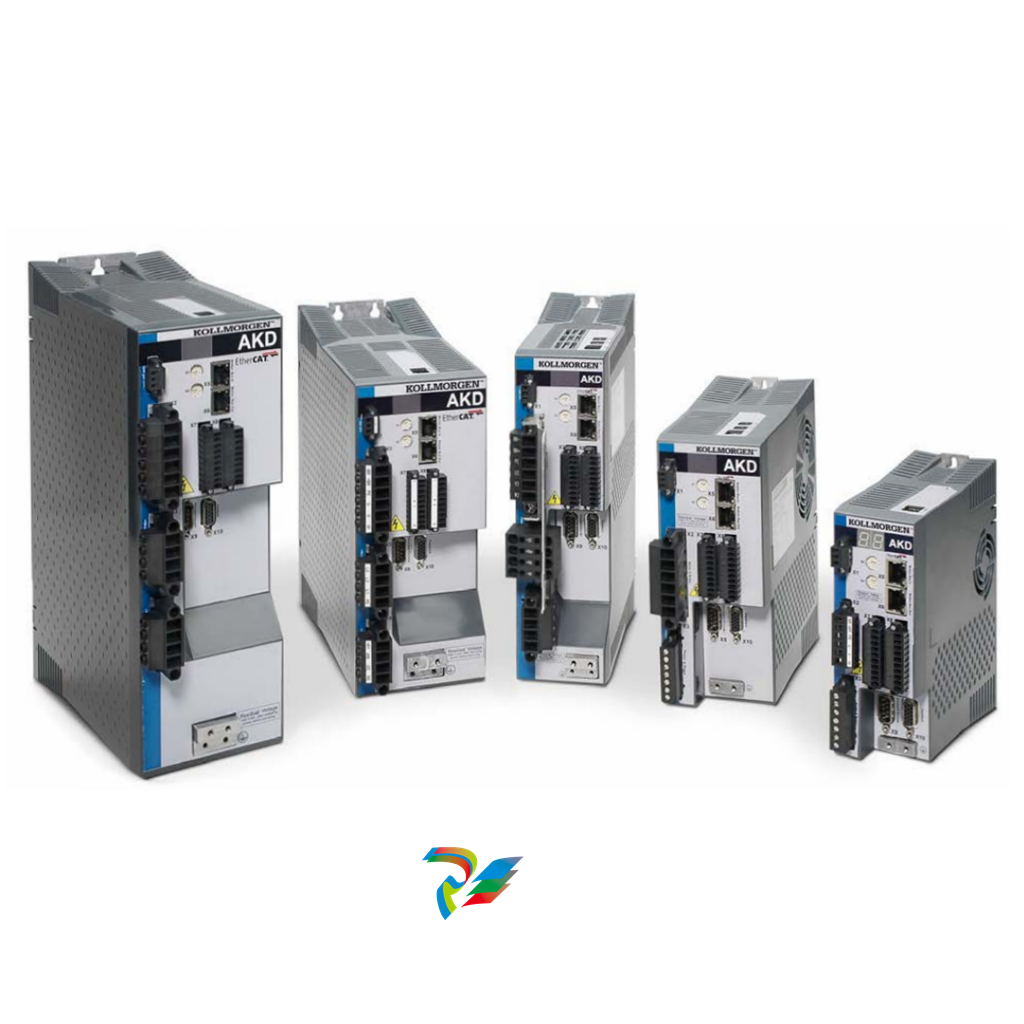
- KOLLMORGEN
- MEGGITT
- kong-sberg
- METSO
- Motorola
- NI
- OEMAX
- RELIANCE
- scanlab
- schneider
- uniop
- Vibro-Meter
- Honeywell
- Rolls-Royce
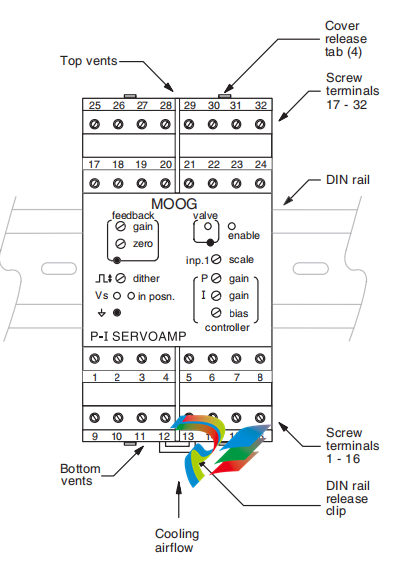
- MOOG
- GE
- B&R
- Woodward
- Yaskawa
- xYCOM
- Siemens
- Emerson
- HIMA
- Bently
- ZYGO
- FOXBORO
- OMACO
- PROSOFT
- ENTERASYS
- TRICONEX
- Parker
- Lenze
- KEBA
- Alstom
- CTI
- ABB
- A-B
142

-
 MITSUBISHI ELECTRIC FR-A500 Series Inverter Manual
 -
 Laumas TLM8 8-channel weight transmitter
 -
 General User Manual for the Anybus X-gateway Series Industrial Gateway
 -
 Instructions for Using NJ/NX Series CPU Unit OPC UA
 -
 OMRON Machine Automation Controller NX-series System Units
 -
 FANUC Series 16i/18i/21i MODEL B Series CNC System Hardware Connection
 -
 PILZ PNOZmulti Classic and PNOZmulti Mini configurable safety controllers
 -
 MITSUBISHI ELECTRIC MELSEC A series Programmable Controller
 -
 Renishaw PHC10-3 PLUS Probe Controller Installation Guide
 -
 Hine Automation Constellation series vacuum wafer transfer system
 -
 PILZ PNOZ m B0 configurable safety control system basic unit
 -
 BANNER BES58-6 series incremental rotary encoder
 -
 Programming Guide for Modicon 884 Programmable Controller
 -
 Eaton LZM series molded case circuit breaker
 -
 Pilz PSWZ X1P Safety Static Monitoring Relay
 -
 Keyence CV-3502P/CV-3000 series visual system
 -
 Pro face GP2400/2500/2600 series programmable human-machine interface (HMI)
 -
 Siemens SINAMICS S120 AC frequency converter
 -
 Allen Bradley 160-IB1 InterBus Communication Module
 -
 MX321 AVR Automatic Voltage Regulator
 -
 GE Multilin MM2 Motor Manager 2 Manual
 -
 SIEMENS C500 microcontroller family architecture and instruction set description
 -
 HORIBA SEC-Z500X Series Digital Mass Flow Controller
 -
 QUBE Servo 2 integrated rotary servo teaching experimental platform
 -
 Schneider Telemecanique TSX17 Micro PLC Communication Module
 -
 GE DC Drives (BCH series) DC Speed Governor
 -
 Honeywell X-DCS3000 Digital Integrated System Manager
 -
 OMRON Z500 high-precision contour measurement system
 -
 Siemens SIMATIC S5-90U/S5-95U Compact PLC
 -
 KEB COMBIVERT F5 elevator dedicated frequency converter
 -
 TOSHIBA TOSBERT VF-S15 Inverter Description
 -
 LS Power Generation SV-IG5A Series Inverter Easy Operation Instructions
 -
 Allen Bradley GuardPLC 1200/1600/1800/2000 Series Controller Systems
 -
 Installation Guide for Omron C1000H/C2000H Series PLC
 -
 Omron F160 Vision Sensor
 -
 Bonner Q45U series short range analog output ultrasonic sensor
 -
 Schneider C60H-DC C-curve DC supplementary protector
 -
 Omron SYSMAC CPM2B series board PLC
 -
 Omron C500 series rack mounted PLC
 -
 Mitsubishi language hardware manual for Mitsubishi FX0/FX0N series PLC
 -
 PULS QS40.241/QS40.241-C2 models 24V/40A/960W single-phase rail mounted switching power supply
 -
 Eaton XV-102-L series industrial touch screen HMI
 -
 Omron FZ5 series visual system
 -
 Schneider TSX 47-10/20/25 series modular sequential PLC
 -
 ABB Procontic CS 31 Distributed Automation System Description
 -
 OMRON H8PR series electronic cam controller
 -
 OMRON 3G3MX2 frequency converter
 -
 Safety and installation wiring instructions for GP477R-EG11 touch human-machine interface
 -
 I/O module for Siemens 3RK series AS-i SlimLine Compact control cabinet
 -
 OMRON NS Series Programmable Terminal Web Interface User Manual
 -
 OMRON Z4M laser displacement sensor
 -
 HIMMERWERK SINUS series high-frequency induction heating generator
 -
 OMRON CP series CP1E CPU unit
 -
 OMRON ZFX-C series intelligent visual sensor
 -
 OMRON ZFV series intelligent visual sensor
 -
 OMRON CJ series CPU unit operation instructions
 -
 Murr Electronics 7000-41034-0400400 M12 Power Connector Instructions
 -
 OMRON ZFX series simple visual sensor
 -
 REER ULISSE UNC safety photoelectric protection device
 -
 Siemens SIMATIC S5-90U/S5-95U Compact PLC
 -
 OMRON CPM2C Programmable Controller
 -
 Yaskawa ∑ - V series SGDV servo drive matching
 -
 OMRON SYSMAC CP1H series PLC (X/XA/Y type) operating instructions
 -
 OMRON SYSMAC C20K/C28K/C40K/C60K series K-type programmable controllers
 -
 PEPPERL+FUCHS SLVA-4Kplus Safety Light Curtain Controller
 -
 Yaskawa ∑ - II series SGMBH servo motor+SGDH servo driver
 -
 Yaskawa VS-616PC5/P5 series variable torque frequency converter
 -
 OMRON 3G3SV series book style fully digital low-noise frequency converter
 -
 Pro face GP-370 series human-machine interface (HMI)
 -
 OMRON FQ2 series integrated intelligent visual sensor
 -
 SONY SH800SFP cell sorter BioImaging Facility IST Austria
 -
 OMRON 3F88L-160/162 cam locator
 -
 KEB COMBIVERT F4 series frequency converter
 -
 OMRON CJ Series PLC (CJ1H-R/H/G, CJ1M, CJ1) Operating Instructions
 -
 Schneider C60H-DC C-curve DC supplementary protector
 -
 OMRON 3G3MV Multi functional Compact Inverter
 -
 OMRON CQM1H series modular PLC
 -
 Huichuan MCTC-ARD-C Elevator Automatic Rescue Device (ARD)
 -
 SolaHD SDN-D series rail mounted high-performance power supply
 -
 OMRON C200H Series PLC (CPU01-E/03-E/11-E) Operating Instructions
 -
 Allen Bradley 1336 PLUS series AC frequency converter
 -
 OMRON SYSDRIVE 3G3KV-EV2 series frequency converter
 -
 OMRON SYSMAC One NSJ series programmable controller
 -
 Technical specifications for Legrand Megatiker M4 thermal magnetic circuit breaker and MS4 isolating switch
 -
 OMRON ZX series (ZX-L-N) laser intelligent sensor
 -
 Saia PCD1 series compact programmable controller
 -
 OMRON NT series programmable terminal
 -
 Yaskawa F7 series (CIMR-F7U) frequency converter
 -
 Rockwell 1491/1494 series isolation switch and fuse base
 -
 Omron NA Series Programmable Terminal Device Connection Instructions
 -
 Eaton XV-102-L Series Touch Screen Display
 -
 Eaton XV-102-L series touch display screen
 -
 Siemens SINUMERIK Measurement Cycle User Guide
 -
 ELAU PacDrive C600 High Performance Motion Controller
 -
 ELAU PacDrive SM series permanent magnet synchronous servo motor
 -
 Bently Nevada Orbit 60 Series Integrated Unit Protection and Condition Monitoring System
 -
 YOKOGAWA STARDOM FCN-RTU Autonomous Controller
 -
 Fireye InSight ® II Marine Flame Scanner
 -
 Installation and Use Instructions for ABB VSC 7.2/12kV-400A Vacuum Contactor
 -
 Rexroth Bosch Group VT 2000-52 (5X series) Electrical Proportional Amplifier
 -
 ALSTOM ALSPA series frequency converter
 -
 ABB Relay Retrofit Program for SPACOM to REX615 Product Guide
 -
 Meggitt C327895 gas metering valve
 -
 Moog G77X/-77X series high-performance flow control servo valve
 -
 WOODWARD 2301E Digital Load Sharing and Speed Control for Engines
 -
 ABB UNITROL ® 1000 series compact IGBT automatic voltage regulator
 -
 ABB UNITROL ® High end excitation control system for 6000 synchronous generators/motors
 -
 Rexroth Bosch Group HNC100 Programmable Digital Axis Controller
 -
 Lenze 8400 StateLine C Inverter Operating Instructions
 -
 Leybold PENNINGVAC PR25/PR26/PR27/PR28 series passive cold cathode Penning vacuum gauge tube
 -
 Leybold SOGEVAC DI&BI series oil lubricated rotary vane vacuum pump
 -
 Leybold THERMOVAC TTR 91/96/911/916 N series vacuum transmitter
 -
 Leybold TTR 101 series vacuum transmitter
 -
 Honeywell TC847A1004 Reflective Linear Beam Smoke Detector
 -
 Oerlikon Leybold Vacuum TURBOVAC series turbo molecular pump operation guide
 -
 Leuze electronic DDLS 200 series bus type infrared optical data transmission equipment
 -
 Lam Research 853-012123-004 model harmonic drive component
 -
 LZS-A1000-3 Power Installation, Operation, and Maintenance Instructions
 -
 MTL2000 series intrinsically safe isolation safety barrier
 -
 MTS Temposonics ® GB series (GBS/GBN) analog magnetostrictive linear displacement sensor
 -
 MTS Temposonics ® R-Series magnetostrictive absolute non-contact displacement sensor
 -
 Original inventor of M ü ller Co ax AG coaxial valve
 -
 Murrelektronik family of industrial automation connection and control solutions
 -
 Nabtesco RV series high-precision reducer
 -
 NACHI-FUJIKOSHI 2020 Industrial Robot Full Series Products
 -
 ESD series electro-hydraulic proportional flow directional control valve
 -
 NEC FC-9801X Industrial Factory Computer
 -
 GE Vernova Mark VIeS Functional Safety System

KONG JIANG

Add: Jimei North Road, Jimei District, Xiamen, Fujian, China
Tell:+86-15305925923